Home
Quickstart Guide
Introduction RIO Academic RIO Application examples Your first RT app Your first FPGA app
Real-Time
Basic procedures System admin File system I/O monitor System controller architecture Timed loops Inter-process communication RT/Host communication RT/FPGA communication FPGA personalities Interrupts Datalogger (file I/O)
FPGA
Design flow Simulation Inter-process communication RT/host communication Derived clock domain IP blocks FPGA personality
Networking
Get connected Email Web services UDP TCP IP addresses
Site Map
Guides Code examples Procedures Tags LabVIEW block diagram elements Targets Communications All pages
Glossary How to use About
RIO Developer Essentials Guide for Academia

"RT" target

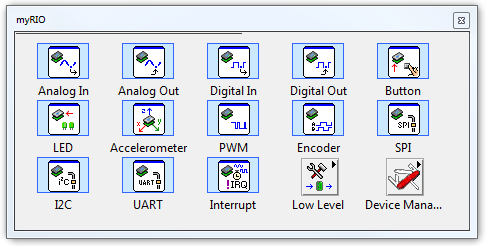
Develop Academic RIO Device applications by writing code exclusively for the RT target, and use Express VIs to access the wide variety of I/O devices implemented by the default Device FPGA personality.
Create a new LabVIEW project for the RT target, use the Academic RIO Device Toolkit and default FPGA personality, and deploy a VI as the start-up application.
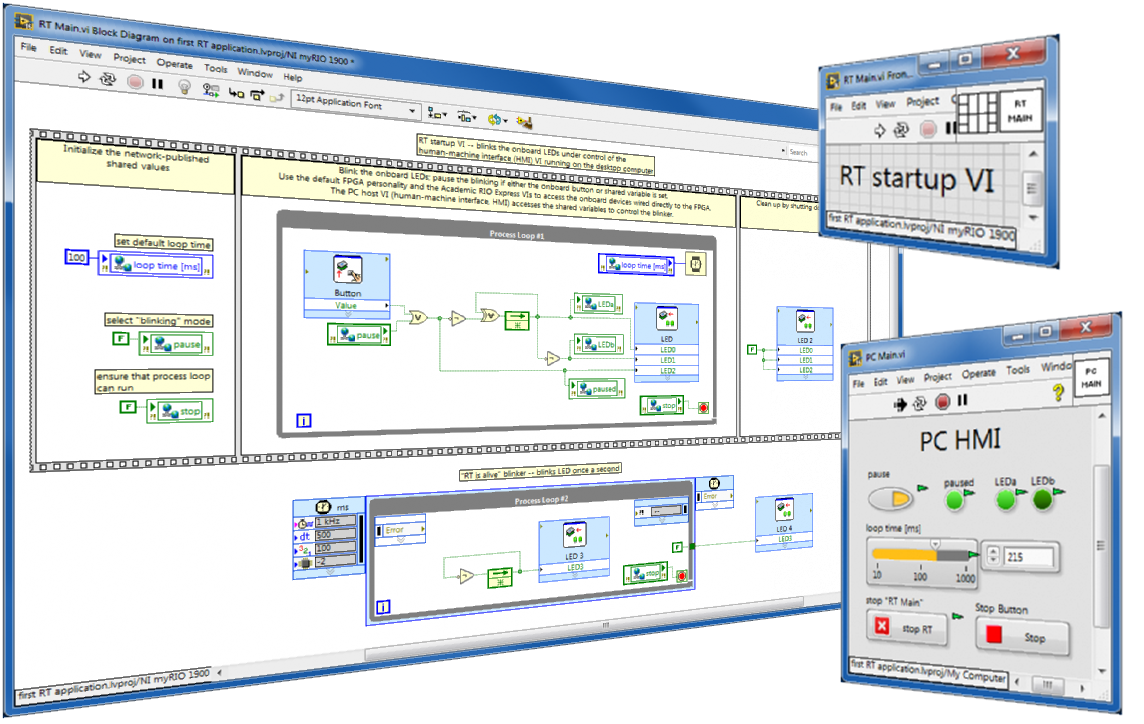
Follow along with this step-by-step tutorial to make a "hello, world!"-like application to experience the advantages of multiple linked VIs running simultaneously on the real-time (RT) target and desktop computer: (1) "RT Main" runs as the RT target start-up VI, blinks the onboard LEDs, and reads the onboard button; these onboard devices physically connect to the FPGA I/O pins which are accessed with the Academic RIO Device Toolkit Express VIs and default FPGA personality, and (2) "PC Main" VI runs on the desktop computer as a user-friendly human-machine interface (HMI) for remote command and control of "RT Main" through the network via shared variables hosted on the RT target.
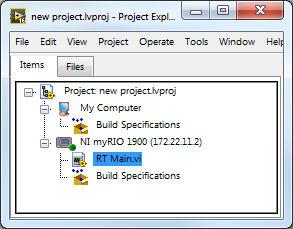
Set up a LabVIEW project for an RT VI.
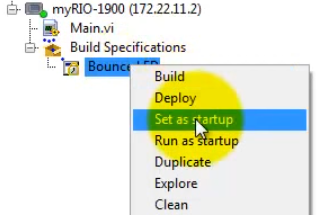
Deploy a LabVIEW VI as a 'startup application' that runs automatically immediately after the Academic RIO Device boots up.
The FPGA "personality" (bitstream configuration file) determines how the RT target interacts with peripheral devices. The personality can also implement custom functionality.

I/O Monitor
RT procedure

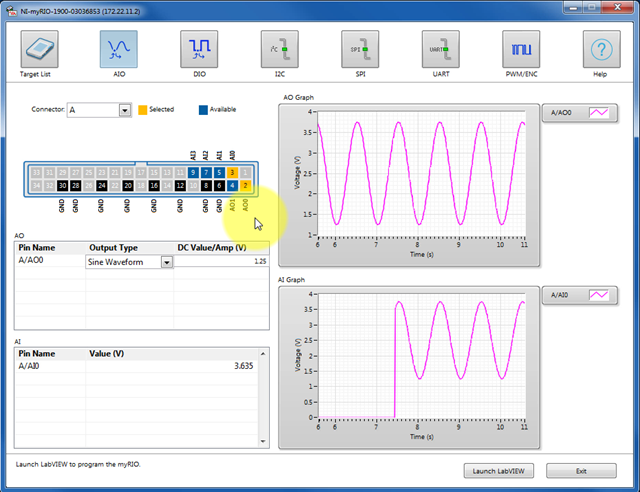
Interactively set output values and monitor input values on the Academic RIO Device MXP and MSP connector signals to quickly test your connected peripheral devices without creating a VI. Note: The NI ELVIS III does not have an I/O Monitor at this time.
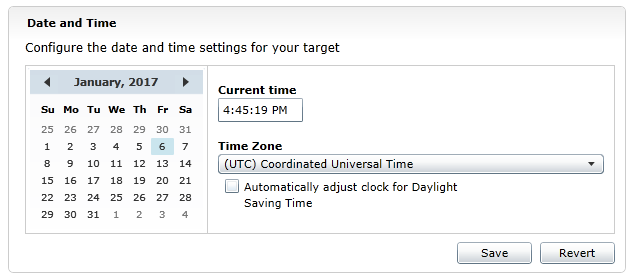
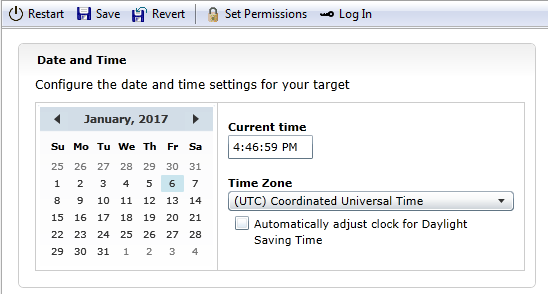
Set the administrator password to secure your Academic RIO Device system, adjust the system time and date, and manage the installed software set add-ons.
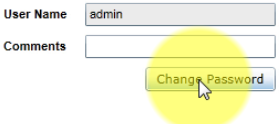
Secure your Academic RIO Device system from unauthorized access by setting the password for the "admin" user and removing all permissions from the "everyone" group.
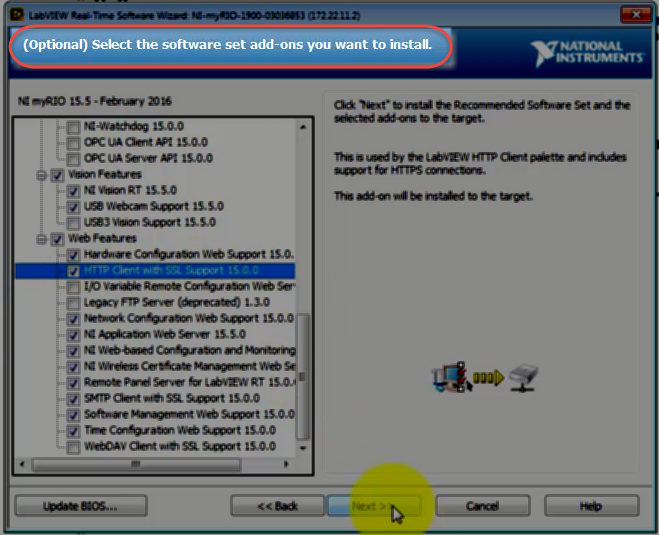
You will need to enable some software set add-ons to make some built-in LabVIEW VIs work properly on the RT target, for example, 'SMTP client with SSL support' (for secure email) and 'HTTP Client with SSL Support' (for secure HTTP).
Browse directly to the Academic RIO Device network address to use the Web-Based Monitoring and Configuration tool. Note: The NI ELVIS III does not have the Web Interface for modifying these settings. Use NI Measurement and Automation Explorer (NI MAX) to modify these settings instead.
Use the NI Measurement & Automation Explorer (NI MAX) application.
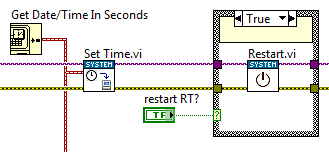
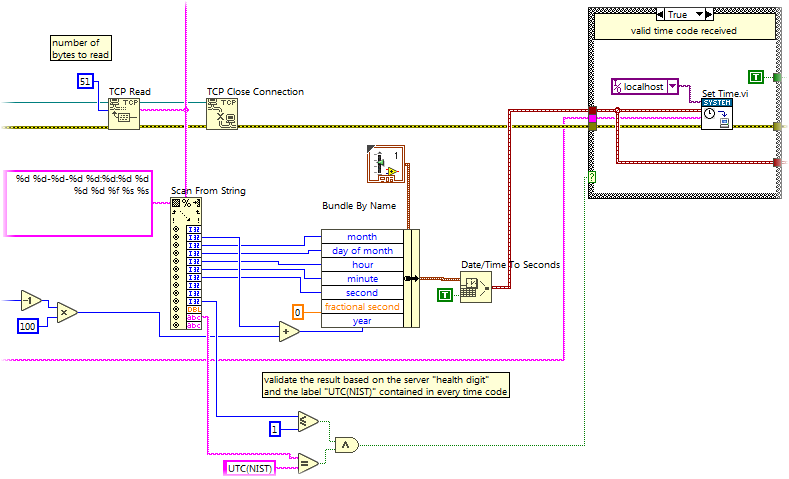
Use the "Set Time" function to adjust the RT system time to match the (assumed accurate) PC system time. Restart the RT target to save the current RT time to be reloaded on each reboot of the Academic RIO Device.
Synchronize the system clock time based on querying the Internet Time Service (ITS) maintained NIST (National Institute of Standards and Technology): Open a TCP/IP connection to the "Daytime Protocol" port 13, read the 51-character string, parse the string for time and date information, validate the result (look for a server health indicator and a "magic string"), and then adjust the system time.

RT procedures: File system
RT guide PC guide

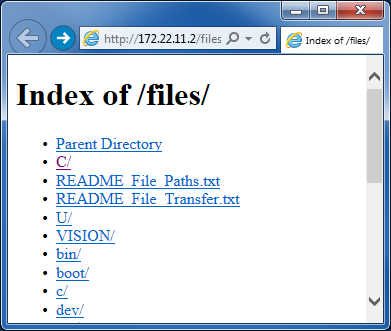
Connect to the Academic RIO Device file system through your browser with "Web-Based Monitoring and Configuring" or by mounting the file system as a drive on your host PC with WebDAV.
View the Academic RIO Device file system through your web browser; files may be downloaded with this technique, too.
Mount the Academic RIO Device file system as a network drive on your Windows, Mac OS, or Linux system, and then directly manipulate the files as you would any other files on your system.
Monitor process variables and sensor measurements, timestamp them, and log them to a file, and then remote access the datalog file through the network with WebDAV, web browser, or VI running on a PC host.
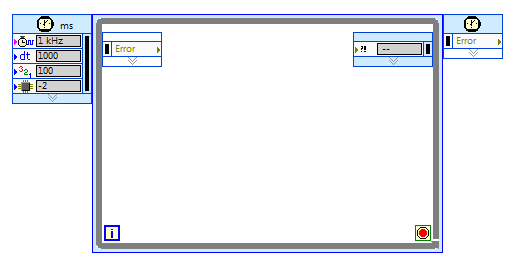
A "timed loop" is a while-loop structure that executes at a precise user-specified rate. Timed loop are particularly useful for process control loops that demand a reliable update rate.

Timed loop
RT code

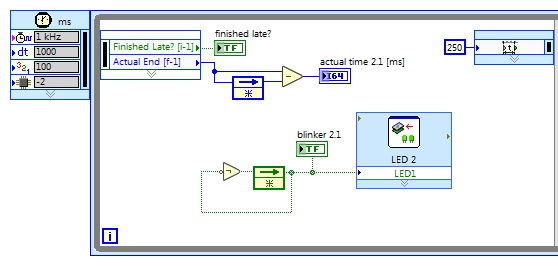
Use the "Timed Loop" to create a deterministic process loop, i.e., a loop that runs with a precisely-defined time per iteration.
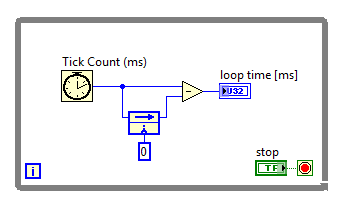
Use the "Tick Count" function to measure the total elapsed time per iteration of a process loop.
Use an onboard timer or an external event interrupt request (IRQ) to immediately execute a task.
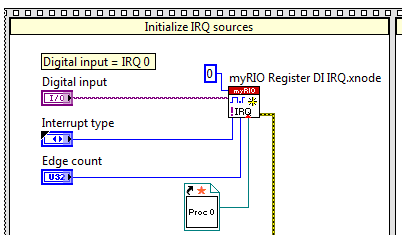
Run a callback VI each time that a digital input transition or an analog input voltage threshold crossing generates an interrupt request (IRQ).
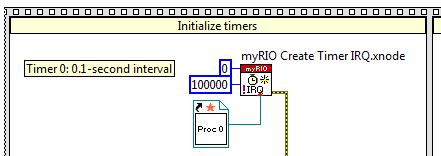
Run a callback VI each time that an FPGA-based interval timer generates an interrupt request (IRQ).
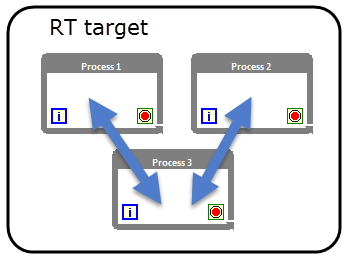
Exchange data between process loops running in parallel on the RT target.
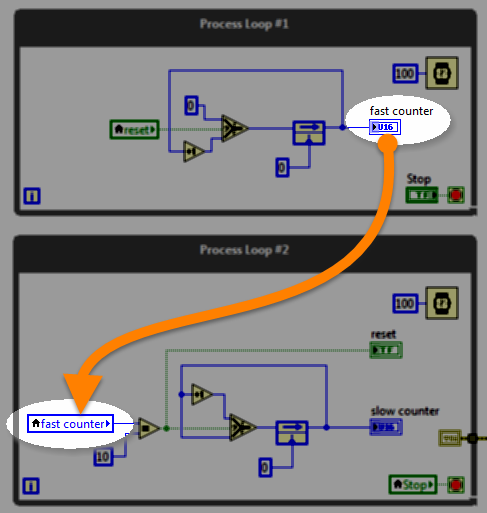
Use a local variable (front-panel indicator) to communicate between two parallel process loops contained within the same VI, and use a local variable to stop parallel loops with one "stop" button.
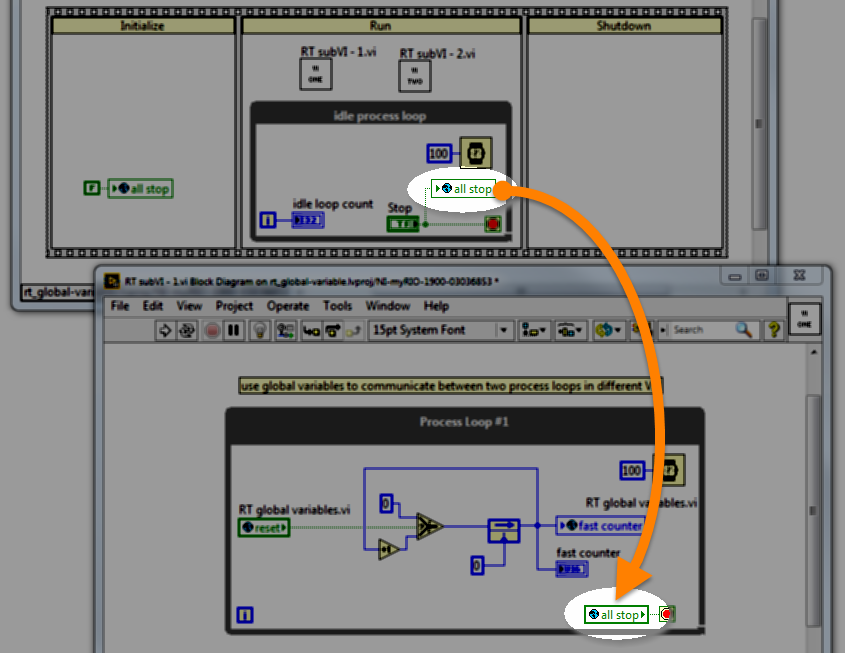
Use a global variable to communicate between two parallel process loops contained within different VIs under the same target, and use a global variable to stop parallel loops with one "stop" button.
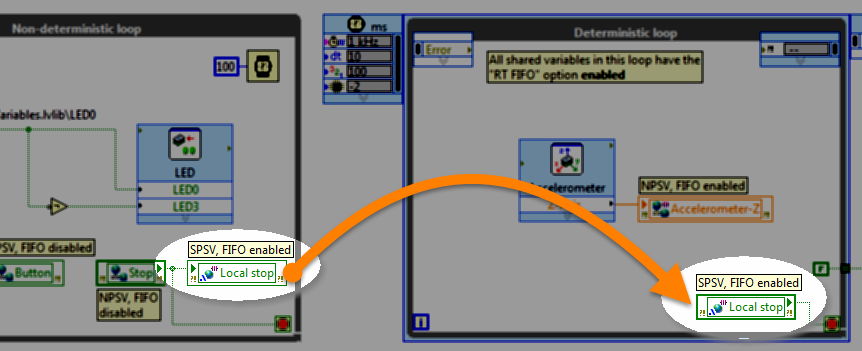
A single-process shared variable (SPSV) behaves like a global variable that links deterministic and non-deterministic process loops, effectively shielding the deterministic loop from elements that contribute jitter.
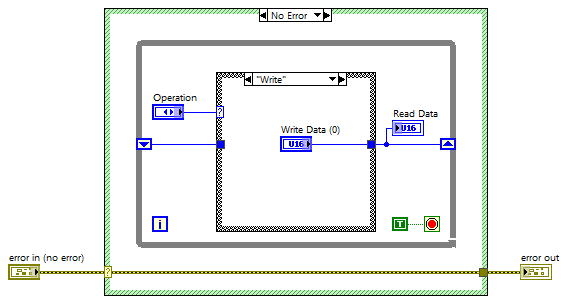
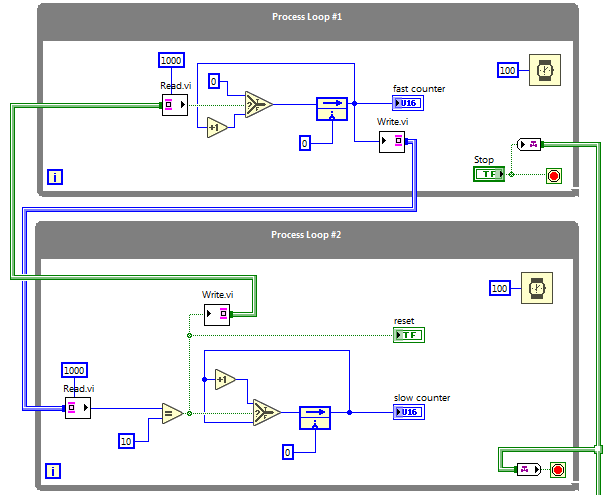
Use a functional global variable (FGV) to communicate between two parallel process loops contained within different VIs under the same target, and use a FGV to stop parallel loops with one "stop" button. The "functional" nature of the FGV means that you can create additional functionality beyond that of a basic global variable, e.g., counting and calculations that operate on the stored value.

Queue
RT code
Use a queue to send messages and data between two or more parallel process loops contained within a VI or other VIs. Queues also serve as the foundation for the "Queued State Machine" design pattern.

Channel wire
RT code
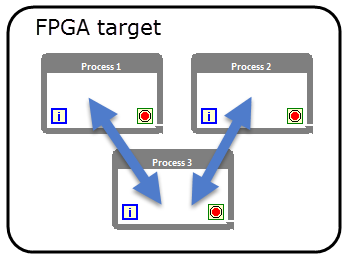
Use a channel wire to communicate between two (or more) parallel process loops contained within the same VI, and use a channel wire to stop parallel loops with one "stop" button. Requires LabVIEW 2016 or later version.
Exchange data between process loops running in parallel on the RT target.
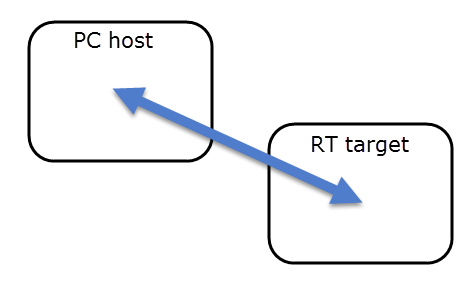
Transfer data, commands, and status between the RT target and a host system.
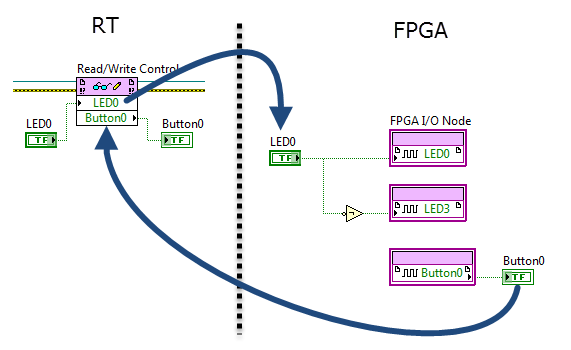
The RT VI operates (writes) the front-panel controls of the FPGA VI and reads its indicators.
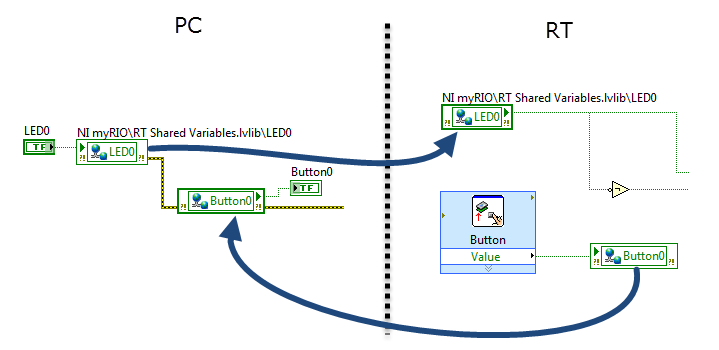
An NPSV behaves like a global variable to connect the RT target and PC host through a network.
The network-published shared variable (NPSV) behaves like a global variable to link targets through the network.
A quick and easy way for a PC HMI (human-machine interface) VI to observe the state of an RT-hosted network-published shared variable (NPSV) without creating any block diagram code; an alternative to programmatically accessing the NPSV value.
A network-published shared variable (NPSV) behaves like a global variable that links process loops residing in two or more network-connected targets.
Use the NPSV programmatic API (application programmer's interface) VIs as an alternative method to a shared variable node.
Send command and status messages through a low-latency lossless network-based data communication channel between the RT target and PC host system.
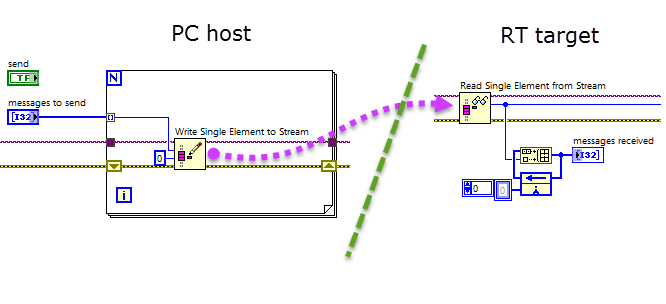
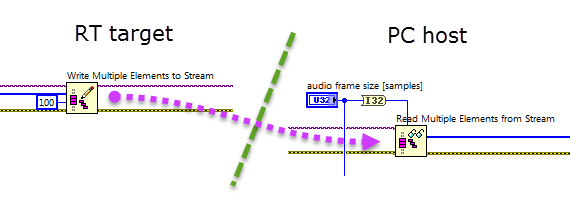
Efficiently transfer blocks of data between the RT and PC by network streams.
Efficiently transfer blocks of data between the RT and FPGA by direct memory access (DMA) first-in first-out (FIFO) buffers.
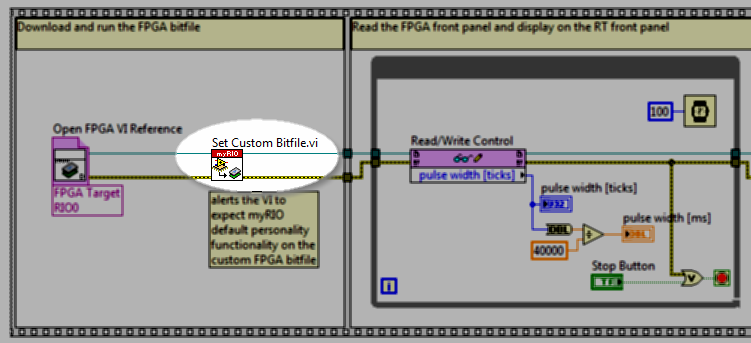
Load and run a modified version of the default Academic RIO Device personality (FPGA bitfile) augmented by user-defined functionality, for example, to make a high-precision measurement of pulse width.
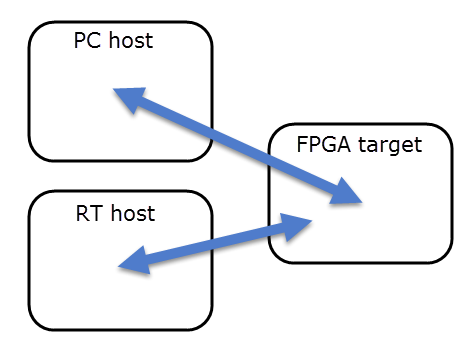
Transfer data, commands, and status between the FPGA target and a host system (RT or PC).
Queue-based state machines excel at implementing system control, data measurement and processing, and other tasks to respond to inputs from the surrounding physical system and user interface. Learn about three popular design patterns: queued state machine (QSM), queued message handler (QMH), and event-driven producer-consumer loops.
State machines perform system control, data processing, and any task that involves executing a sequence of activities in response to inputs from the surrounding physical system, the user interface, and other processes within the system. The queued state machine is a particular implementation style that is flexible and versatile, easy to maintain, and computationally efficient.
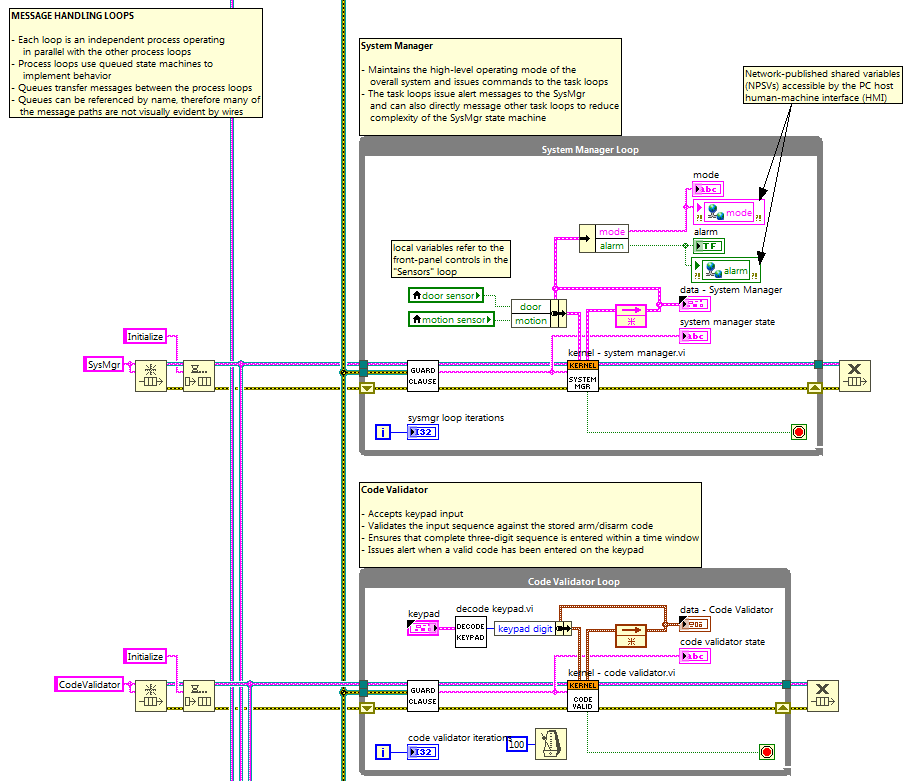
The queued message handler contains multiple process loops operating independently and in parallel that communicate with each other by sending messages through queues. Each process is a well-defined task implemented by the "Queued State Machine" design pattern. Breaking up the system into self-contained tasks greatly simplifies the design of complex systems.
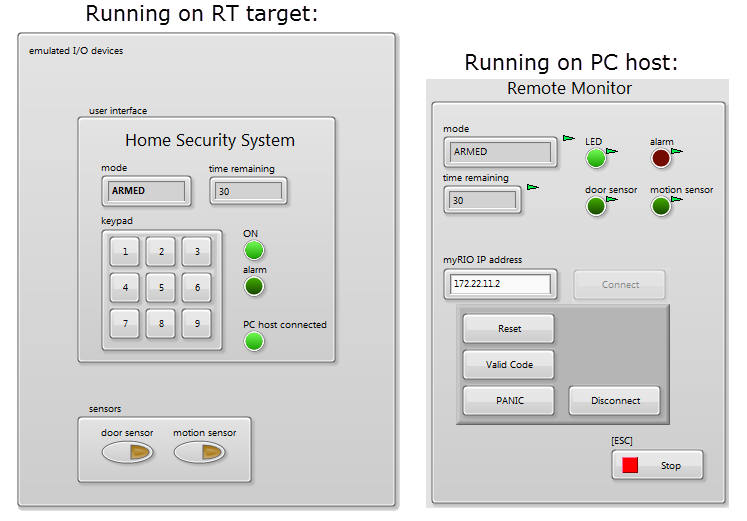
Example of a complete RT system controller based on the Queued Message Handler (QMH) design pattern with multiple parallel task loops implementing behaviors with queued state machines (QSMs), various inter-process communication techniques (queues and local variables), and inter-target communication techniques (network-published shared variables (NPSVs) and network streams). The PC host human-machine interface (HMI) can remotely connect to the system through the network, monitor the status of the security system, and control it remotely.
Set up wired and wireless networks and connect to the Internet.
Connect an Academic RIO Device to a home wireless router to gain access to the Internet. Note: The NI ELVIS III does not have the Web Interface for modifying these settings. Use NI Measurement and Automation Explorer (NI MAX) to modify these settings instead.
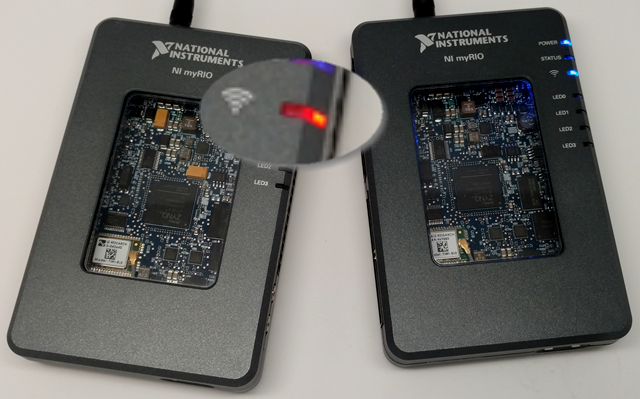
Set up one Academic RIO Device to serve as the ad-hoc network host, and then set up additional Devices to join the ad-hoc network. Note: The NI ELVIS III does not have the Web Interface for modifying these settings. Use NI Measurement and Automation Explorer (NI MAX) to modify these settings instead.
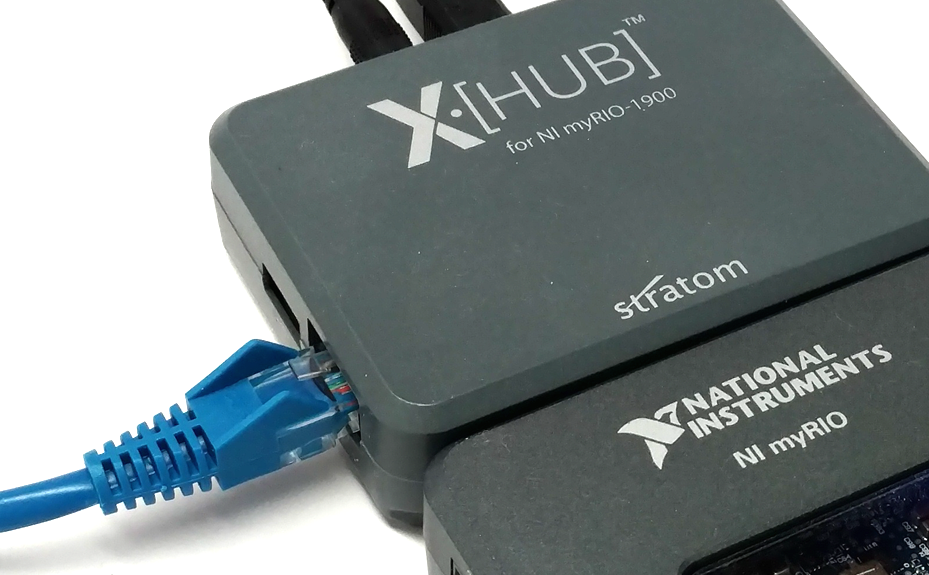
Connect the Academic RIO Device to a PC with a wired network (Ethernet) and establish the Device's Internet connection by sharing the PC wireless connection to a home wireless router. Note: The NI ELVIS III does not have the Web Interface for modifying these settings. Use NI Measurement and Automation Explorer (NI MAX) to modify these settings instead.

RT networking: IP addresses
RT guide PC guide

Display available IP addresses on the PC host and RT target; learn my public Internet IP address by calling a Web service.
Use NI MAX to learn the network address (IP address) of your Academic RIO Device.

Show available IP addresses
RT code PC code
Display all of the network IP (Internet Protocol) addresses at which the RT target or PC host can be reached.
Send email (including attached files) and text messages from the Academic RIO Device.
Use the Simple Mail Transport Protocol (SMTP) to send an email message; send the email to an SMS (Short Message Service) gateway service to forward the email as a text message.
Use the low-level Simple Mail Transport Protocol (SMTP) VIs create an email, attach a file, and set the email header to flag the message as 'high priority' in the recipient's email application. The illustrative application example captures webcam images at regular intervals and sends them as email attachments.
TCP is a reliable connection-based IP networking protocol used between LabVIEW applications as well as other IoT devices.
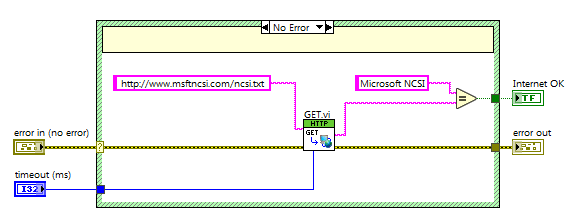
Determine whether or not Internet access is available by attempting an HTTP connection to the "Microsoft Network Connectivity Status Indicator" (NCSI) web service.
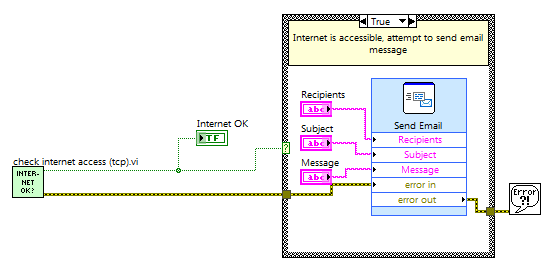
Determine whether or not Internet access is available by attempting a TCP connection to the "Microsoft Network Connectivity Status Indicator" (NCSI) web service.
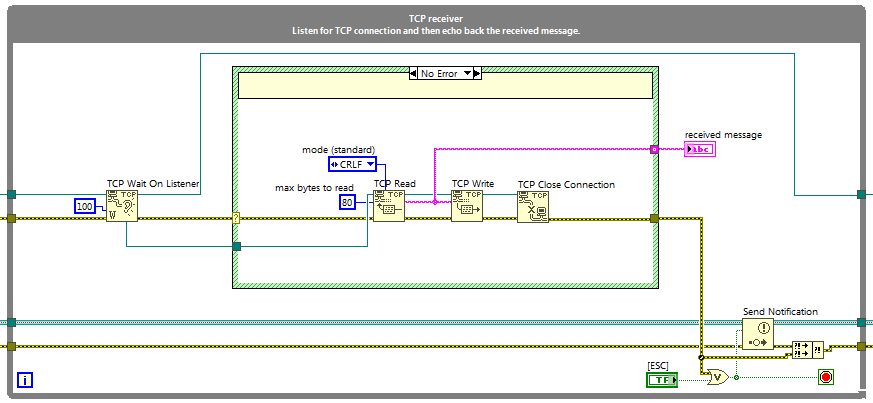
Send TCP/IP messages to a destination IP address and port number, listen for incoming TCP/IP messages on a user-defined port, and echo received messages back to the source. Combine the sender and receiver into a single "TCP ping" application to test the communication channel between two network hosts, and illustrate the notifier method to stop parallel loops with one "stop" button.

TCP client-server
RT code PC code
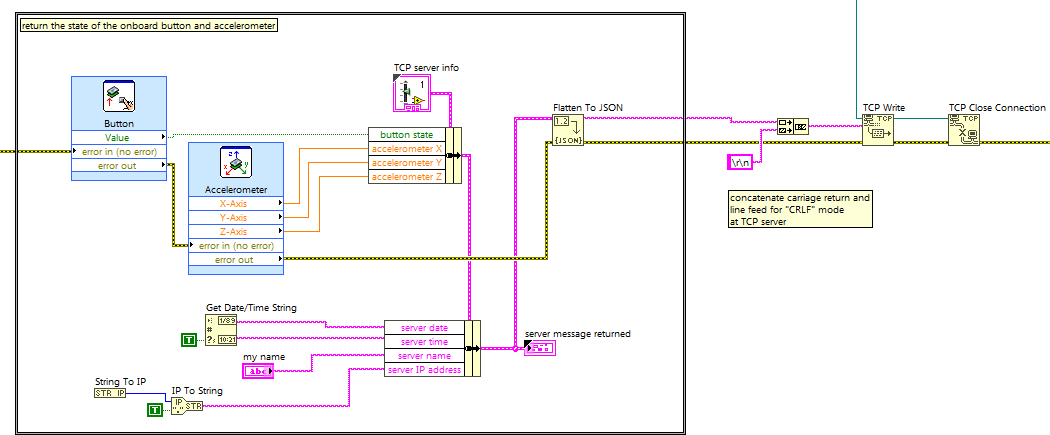
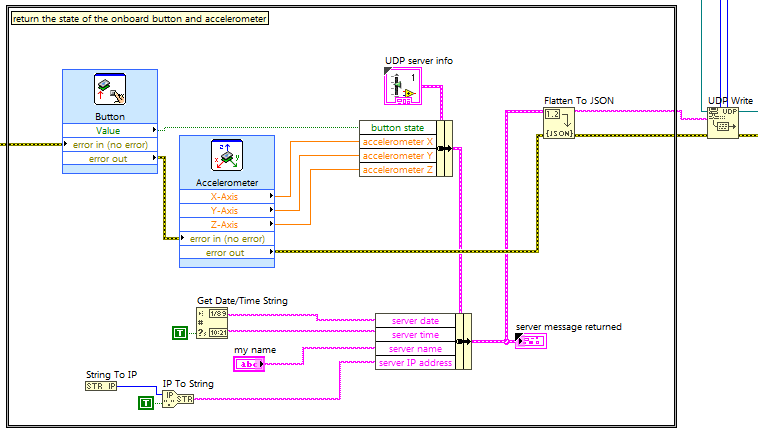
Create a server on the Academic RIO Device that listens for TCP/IP network connection requests from a client running on the PC host, accepts client information including the desired state of the four onboard LEDs, sets the LEDs accordingly, and returns the state of the onboard 3-axis accelerometer and pushbutton.
UDP is a simple and efficient connectionless IP networking protocol used between LabVIEW applications as well as other IoT devices.
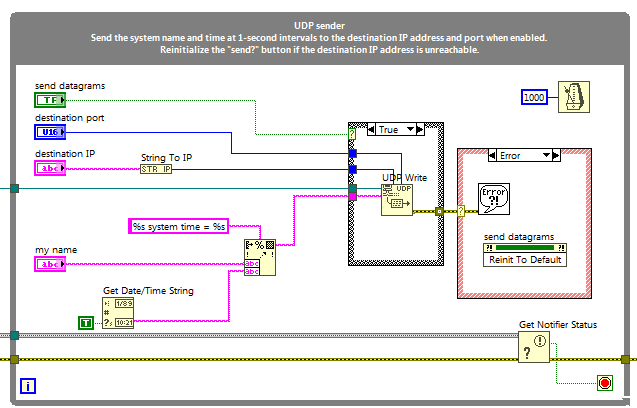
Send UDP messages to a destination IP address and port number, listen for incoming UDP messages on a user-defined port, and echo received messages back to the source. Combine the sender and receiver into a single "UDP ping" application to test the communication channel between two network hosts, and illustrate the notifier method to stop parallel loops with one "stop" button.

UDP client-server
RT code PC code

Create a server on the Academic RIO Device that listens for UDP datagram messages from a client running on the PC host, accepts client information including the desired state of the four onboard LEDs, sets the LEDs accordingly, and returns the state of the onboard 3-axis accelerometer and pushbutton.
Use the infrastructure of the Web for machine-to-machine exchange of information.
A "Web service" uses the infrastructure of the Web for machine-to-machine exchange of specific information. The Academic RIO Device can call Web services to retrieve information and can also host Web services to provide information to other systems.
Learn the technical principles necessary to create VIs that can call Web services which return information in the form of JSON strings.
Form a query string as a URL, retrieve the JSON string served by the Web service, and parse the JSON string to extract useful information.
Learn the technical principles necessary to host a Web service on the Academic RIO Device. Remote clients such as another LabVIEW-based target, an IoT device, or a conventional browser can retrieve sensor measurements and control indicators and actuators using commands obtained from the remote client's request query string.
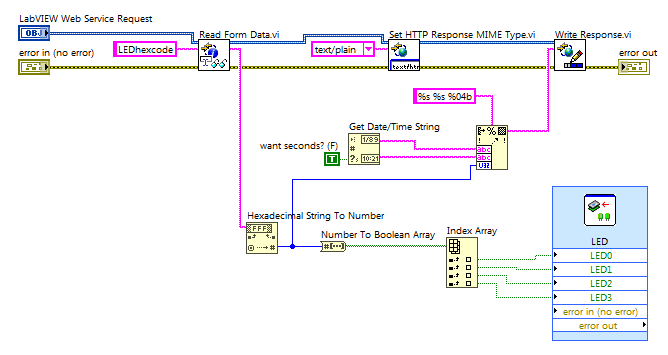
Host a web service on the Academic RIO Device to serve the states of onboard sensors (pushbutton and accelerometer) and system information (date, time, host name, and IP address), and to control the onboard LEDs based on a user-selected LED hex code.